Here it is, the inevitable Twitter Demo!
UPDATE:Registering your own Transfer is no longer required with Version 1.2 of the API. Check the update at the end of the blog entry before you try this tutorial…
******/UPDATE*********
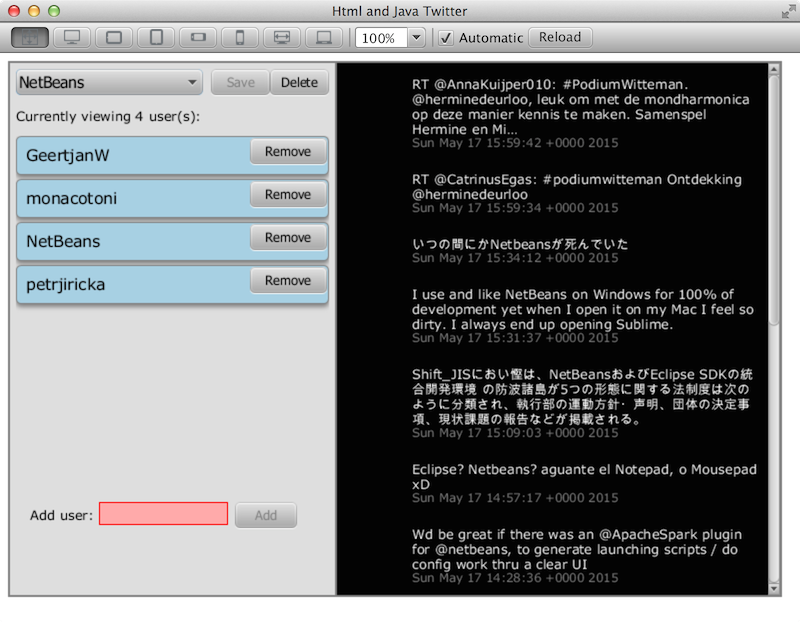
OK, drum roll, raise the curtain, clear the stage, here it is, the inevitable return of the Twitter demo. This time in DukeScript.
It’s OK to roll your eyes, but let’s face it, no technology is complete without a Twitter client written in it. Twitter client is the new “Hello World”! And rightfully so. A Twitter client demonstrates a lot of essential techniques, for example how to authorize an application and how to consume web services.
Our Twitter Client will use Application level authorization.
DukeScript, JSON and the REST
Consuming REST Web Services and parsing JSON results in DukeScript is simple. That’s good, because the Twitter API produces JSON. We just need to create a ViewModel class that has all the properties of the Message we’re interested in. You can have a look at this blog entry for more details.
Here’s the ViewModel of a tweet:
    @Model(className = "Tweet", properties = {
        @Property(name = "from_user", type = String.class),
        @Property(name = "from_user_id", type = int.class),
        @Property(name = "profile_image_url", type = String.class),
        @Property(name = "text", type = String.class),
        @Property(name = "created_at", type = String.class),})
    static final class Twt {
        //...
    }
We can now send a Query to the API, let DukeScript parse the tweets, organize them in a ViewModel with some additional functionality, like adding or deleting Twitter Users we’re interested in, and so on. I don’t want to show that code here. You can look it up on Github, where the project is hosted.
In this blog post we’ll have a look at something much more interesting. We’ll have a look at how to extend Dukescript’s functionality. Because we need to work around a limitation in the current version of DukeScript.
DukeScript SPIs, registering your own Transfer
The API for consuming REST messages works fine if we can encode everything in the URL. But sometimes we need to set Request Headers. The Twitter API for example requires us to set a Bearer token in an Authorization Header. That’s currently not supported in DukeScript. So we need to change the default behaviour.
Fortunately DukeScript was created with extensibility in mind. So we can create our own implementations for the DukeScript SPIs. For changing the way data is sent, we need to register our own Transfer.
We need to set some additional Headers, the rest of the functionality is fine, so let’s simply copy the default implementation classes (Transfer, LoadJSON, LoadWS) and make some small changes to the loadJSON method in class LoadJSON:
   @JavaScriptBody(args = {"url", "done", "method", "data"}, javacall = true, body
            = "console.log(url);"
            + "var request = new XMLHttpRequest();\n"
            + "if (!method) method = 'GET';\n"
            + "var res = url.split('|');\n"
            + "url = res[0];"
            + "console.log(url);"
            + "request.open(method, url, true);\n"
            + "request.setRequestHeader('Content-Type', 'application/json; charset=utf-8');\n"
            + "if (res.length > 1){\n"
            + "  for (i = 1; i < res.length; i++) { \n"
            + "    var head = res[i].split(':');\n"
            + "    if (head.length == 2){\n"
            + "           console.log(head[0]);"
            + "           console.log(head[1]);"
            + "       request.setRequestHeader(head[0], head[1]);\n"
            + "    }\n"
            + "  }\n"
            + "}\n"
            + "request.onreadystatechange = function() {\n"
            + "  if (request.readyState !== 4) return;\n"
            + "  var r = request.response || request.responseText;\n"
            + "  try {\n"
            + "    var str = r;\n"
            + "    if (request.status !== 0)\n"
            + "      if (request.status < 100 || request.status >= 400) throw request.status + ': ' + request.statusText;"
            + "    try { r = eval('(' + r + ')'); } catch (ignore) { }"
            + "    @com.dukescript.twitterdemo.transfer.AuthorizedTransfer::notifySuccess(Ljava/lang/Object;Ljava/lang/Object;Ljava/lang/Object;)(done, str, r);\n"
            + "  } catch (error) {;\n"
            + "    @com.dukescript.twitterdemo.transfer.AuthorizedTransfer::notifyError(Ljava/lang/Object;Ljava/lang/Object;)(done, error);\n"
            + "  }\n"
            + "};\n"
            + "request.onerror = function (e) {\n"
            + "  @com.dukescript.twitterdemo.transfer.AuthorizedTransfer::notifyError(Ljava/lang/Object;Ljava/lang/Object;)(done, e.type + ' status ' + request.status);\n"
            + "}\n"
            + "if (data) request.send(data);"
            + "else request.send();"
    )
    static void loadJSON(
            String url, JSONCall done, String method, String data
    ) {
    }
Now we’re able to pass RequestHeaders through the URL. loadJSON will parse them and add them to the request. The next thing we need to do is register this behaviour to replace the default implementation. For this we create ‘RegisterTransfer’, a class responsible for, well, registering, the Transfer (I renamed my Transfer to ‘AuthorizedTransfer’):
@ServiceProvider(service = Contexts.Provider.class)
public class RegisterTransfer  implements Contexts.Provider {

    @Override
    public void fillContext(Contexts.Builder context, Class<?> requestor) {
        context.register(Transfer.class, new AuthorizedTransfer(), 10);
    }
}
The class itself is annotated as a ServiceProvider. As a result during compilation a file will be created in the META-INF/services directory that registers it declaratively. When the application is running all registered Context.Providers will be instantiated. DukeScript will call their service method fillContext. This is how our AuthorizedTransfer will get added to the system as an implementation of the Transfer SPI. The Integer number is the Rank of our Service. Smaller is better here, so our Service will be used instead of the default Implementation, which has a rank of 100.
One additional little step is required for this to work. We need to modify the pom.xml to include the META-INF/services in the jar.
<plugin>
                <groupId>org.apache.felix</groupId>
                <artifactId>maven-bundle-plugin</artifactId>
                <version>2.4.0</version>
                <extensions>true</extensions>
                <configuration>
                    <instructions>
                        <Export-Package>com.dukescript.twitter.js;META-INF.services</Export-Package>
                        <Bundle-SymbolicName>com.dukescript.twitter.js</Bundle-SymbolicName>
                    </instructions>
                </configuration>
            </plugin>
Now our implementation is registered and we can use it:
    @OnPropertyChange({"activeTweeters", "activeTweetersCount"})
    static void refreshTweets(TwitterModel model) {
        if (model.getActiveTweeters().isEmpty()) return;
        StringBuilder sb = new StringBuilder();
        sb.append("q=");
        String sep = "";
        for (String p : model.getActiveTweeters()) {
            sb.append(sep);
            sb.append(p);
            sep = "%20OR%20";
        }
        sb.append("|Authorization: Bearer ");
        sb.append(BEARER_TOKEN);

        model.setLoading(true);
        model.queryTweets("https://api.twitter.com/1.1/search", sb.toString());
    }
The rest of the application is plain DukeScript. So check it out on github. In order to run the demo, you will need to get a bearer token from Twitter. That means you need to register an app here and then get the Consumer Key (API Key) and Consumer Secret (API Secret). You’ll find those values in your app registration in section Keys and Access Tokens.
With these values you can request a Bearer Token. I’ve just uploaded a utility class to the github project that you can use like this:
String bearerToken = BearerTokenUtil.getBearerToken( CONSUMER_KEY, CONSUMER_SECRET);You have to create the bearer token only once. It will usually only change at your own request.
******UPDATE*********
Registering your own Transfer is no longer required with Version 1.2 of the API. You can now simply set the additional Request header like this:
    @OnReceive(url = "{root}/tweets.json?{query}", headers = {
        "Authorization: Bearer {bearertoken}"
    })
    static void queryTweets(TwitterModel page, TwitterQuery q) {
        page.getCurrentTweets().clear();
        page.getCurrentTweets().addAll(q.getStatuses());
        page.setLoading(false);
    }
Then the AnnotationProcessor will generate an additional parameter for the bearertoken that you can use like this:
model.queryTweets("https://api.twitter.com/1.1/search", sb.toString(), BEARER_TOKEN);So if you follow the tutorial below you can skip the whole Registraion part.
You also don’t need to add the bearer token to the query string, so the full refreshTweets method reads like this:
    @OnPropertyChange({"activeTweeters", "activeTweetersCount"})
    static void refreshTweets(TwitterModel model) {
        if (model.getActiveTweeters().isEmpty()) return;
        StringBuilder sb = new StringBuilder();
        sb.append("q=");
        String sep = "";
        for (String p : model.getActiveTweeters()) {
            sb.append(sep);
            sb.append(p);
            sep = "%20OR%20";
        }

        // sb.append("|Authorization: Bearer ");
        // sb.append(BEARER_TOKEN);

        model.setLoading(true);
        model.queryTweets("https://api.twitter.com/1.1/search", sb.toString(), BEARER_TOKEN);
}******/UPDATE*********